Translate

Thursday, May 8, 2014

Ma Lai Go, Hong Kong style steamed sponge cake

Whenever I go to Hong Kong, I will never fail to go to Tim Ho wan for my dim sum fix. They have to my opinion the best Cha Siew Polo bun and Ma Lai Go. I cannot comment on the Singapore branches as I have never been there.

So, I have done some research and the traditional Ma Lai Go has to be fermented for at least 2 to 3 days. Tim Ho Wan ferment theirs for two whole days.

Although the cake is brown in colour, it has no brown sugar in its ingredients, just normal sugar. When you ferment the batter, it will turn brown while steaming. I find it interesting, although a little yeast was used, there are no taste of the yeast at all in the steamed cake.

It is fluffy, soft and spongy at the same time. I like the result of the cake with the streaky holes! It is like the 'Pak Tong Go' I used to eat when I was a child. You need patience to make this cake if you want it this way because of the fermentation. I figure you can steam the cake on the same day with just a little waiting but I suppose it will have a different effect. Well, more experiments on the way!

My good friend found this recipe in her written book of recipes from some newspaper cuttings and jotted it down.

Recipe adapted from Ms Amy Beh
Steamer with cover
8 inch container
45 minutes of steaming

Starter
160g Hong Kong flour or any low protein flour like cake flour
35g sugar
1 tsp instant yeast
75ml slightly warm water

180g sugar (can add more if you want it sweeter)
35g bread flour
35g custard powder
20g milk powder
5 eggs
50g melted butter
100g canola oil/any tasteless vegetable oil
1 1/2 tsp baking powder
1/2 tsp bicarbonate of soda
2 tsp alkaline water (optional)

1. First, start the fermentation process by mixing all the ingredients for the starter in a bowl and cover with cling wrap and put it aside.
2. Let it ferment for at least 12 hours without touching it. Mine was fermented for 36 hours. The longer you ferment, the darker will be the colour. The texture and the colour will also depend on how long you ferment it.


3. When you are ready to prepare your cake, sift bread flour, custard powder and milk powder together in a bowl.
4. Place the fermented starter in your mixing bowl and mix it with a beater attachment at low speed.
5. Gradually add the sugar and beat it for a couple of minutes.
6. Now, add in the flour mixture gradually, still at low speed for another couple of minutes until combined.
7. At this moment, change to the whisk attachment in your mixer and add the eggs one at a time at low speed.
8. Turn the speed on medium high and whisk it for 10 minutes more.
9. Scrape down the sides of the bowl half way. Now you will notice that the batter will turn smooth without lumps.
10. At low speed, add in the melted butter and the oil. Mix well.
11. At this juncture, you can either put the batter in a bowl and ferment again in the fridge for 12 hours (I fermented mine for 24 hours) or you can proceed to add on the last of the ingredients and steam it.
12. You can also just ferment it for 2 hours and proceed with the rest of the ingredients. this depends on how impatient you are.
13. When you are ready to steam the cake, or rather fermentation is up, prepare the steamer with a cover and make sure there is enough boiling water.

14. For the pan, I used an 8 inch cake ring and a steaming rack and put baking paper in the cake ring with a single big piece of paper with an overhang for ease of removing the cake later.
15. If you have an 8 inch bamboo steamer, it is all the better and ideal.
16. I suppose you can use a normal round cake pan to steam as well, just make sure you line the pan with a whole piece of baking paper as well for lifting the cake up.
17. Now, add in the alkaline water (lye water) if using.
18. Sift in the baking powder and bicarbonate of soda and mix until just combined.
19. Pour the batter into whichever prepared container you are using to steam the cake, cover and steam at high heat for 45 minutes.

20. Do not be tempted to open the cover for the first 30 minutes.
21. After 30 minutes, you can check whether there is enough water in the steamer. Replenish with hot water to continue steaming if necessary.
22. Let the cake cool on a rack for at least 5 to 10 minutes before removing it from the pan.

Eat it fresh and warm.
Store the rest in the fridge and you can heat it in the microwave for 10 seconds whenever you need a piece!


Sunday, May 4, 2014

Sourdough Bread


This post is long due, I have made countless sourdough bread and my bottle of sourdough is already two years old. I have been feeding the dough weekly only because I am too lazy and I do not make sourdough bread all the time. I literally have to discard some dough whenever I feed it.

Sourdough bread is bread which is fermented with wild yeast in the air instead of commercial yeast. Wild yeast is everywhere - in the air, in the flour and on the surface of some fruits. Commercial yeast has replaced wild yeast because it is easier to mass produced and easier for bakeries to use and store and most importantly it proofs our bread quickly. In contrast, wild yeast works much more slowly to proof breads.

So you ask, why do people bother then? Well, for one, I LOVE the flavour and texture that sourdough that is made with wild yeast gives as compared to bread made with commercial yeast. I admit Singaporeans simply love the soft pillowy bread that is sold in every local bakery. We are so used to soft, sweet and easy to chew bread. We are lazy, are we?

But I  love to chew my bread, once in a while. When I am not rushing to work, we will have sourdough bread with dinner and have nice conversation with my family or friends. I also like to dip my sourdough bread in olive oil, balsamic vinegar, some herbs or simply just smear some good butter on it. If you ask me, I will have very soft tangzhong bread in the morning when I have to rush to work but textured sourdough bread in the evening especially in the weekends. A nice balance I would say.

How about a beginner sourdough bread? It is a bread that does not take a whole day to ferment or rise. It takes just about two hours for the first rise and then about an hour for the second rise. As compared to the seven to eight hours for the purist sourdough bread. This bread uses the bubbly sourdough starter along with the commercial yeast to speed things up as you are getting used to working with sourdough.

Don't worry, this bread does not taste sour as you expected it to be. It is subtle and yet still soft on the inside. The strong sour flavour are only developed over a long, slow fermentation ofr a fully sourdough bread. Since we are on a speedy note, we will not get it so sour. Your bread will taste a little more sour if you have not been feeding your starter for more than two weeks at a stretch or if you use a mature starter. If the starter is fairly new, the taste will be mild.

Would you like a change in taste and texture of your bread? Then, make your own. Starting from the starter. Get it at http://www.thekitchn.com/how-to-make-your-own-sourdough-starter-cooking-lessons-from-the-kitchn-47337

Simple Sourdough Bread Recipe

Ingredients:

3 cups bread flour
2 tsp Kosher salt (or 1 tsp table salt)
1 1/2 tsp instant yeast
1 cup water
1 cup sourdough starter

Method:

Put flour, salt, yeast and water in a mixer with a dough hook.
Make a rough dough.
Add the sourdough starter and knead till smooth and dough leaves bowl.
It is a fairly wet and sticky dough.
Either flour your hands well or put a little oil on your hands to take the dough out onto a oiled big bowl and cover with cling wrap. Let it rise to double its size, about two to three hours.
Before the time is up, flour a proofing basket/brotform/banneton well.
If you don't have this, try a bowl! Oil the bowl, flour it very well.
Dump the dough onto the proofing basket, cover with cling wrap again.
The dough should rise to the desired size by an hour or so.
Turn the dough out onto a lined pan.
Better still, if you have a pizza stone, it will be perfect.


Bake it in a preheated 220 C oven for 15 minutes with a pan of steaming hot water at the bottom of the oven.
After 15 minutes, turn the oven down to 180 C to bake for another 15 to 20 minutes. If you want your bread to be a bit more brown, bake it for another 5 minutes or so.


Saturday, April 5, 2014

Black Glutinous Rice Flour with Palm Sugar Chiffon Cake


Black Glutinous Rice Flour with Palm Sugar Chiffon Cake

You can also call it Pulut Hitam with Gula Melaka chiffon cake. This chiffon cake has a mixture of flavours that is very unique. I like this cake very much. It is a pity that we cannot get hold of black glutinous rice flour easily in Singapore. I only know of one place in Singapore that you can get this flour after I did my research on the net. Before that, it was only in Malaysia or Indonesia that you can get hold of this flour.

I read all about the cake using the black glutinous rice flour but I was so eager to bake it but there was no flour to be found in Singapore. All you get in Singapore is the normal white glutinous flour selling in the shops. I wonder why it is not so popular in Singapore. Is there no market for this kind of flour? I was so desperate that I wanted to buy some black glutinous rice and bring it to Little India for the spice grinders to grind it for me. Or I can also bring it to the Chinese Medical shops for them to grind it for me, as they can grind all sorts of brown rice and hard medicinal herbs to fine powders for babies to consume. But I was going on a trip to Malaysia soon and therefore I waited patiently for the day to come so I can buy some black glutinous rice flour from KL.

At last, I got my hands on them after looking for three supermarkets in KL. It was still a difficult feat for me. The flour became a very precious possession in my bag. But now, I know you can get it in Singapore but I still have to drive a distance to get it. Nevertheless, I made this cake and it was gorgeous, whether it tasted gritty or not, I don't care.


Pulot Hitam with Gula Melaka chiffon Cake

Recipe adapted from Herbs & Spices
Using 25 cm/9 inch chiffon tube pan
180 C oven
 
Ingredients

5 egg yolks
120 ml coconut cream/milk
125 g palm sugar/gula melaka
80 ml canola oil or any tasteless vegetable oil
150 g black glutinous rice flour
1/2 tsp baking powder
1/2 tsp bicarbonate of soda
1 tsp vanilla extract
5 egg whites
75 g fine sugar
1 tsp salt
1/4 tsp cream of tartar

Method

Preheat oven to 180 C.
Sift together black glutinous rice flour with baking powder and bicarbonate of soda. Set aside.
In a mixer, beat together egg yolks with palm sugar/ gula melaka and vanilla extract, until sugar is dissolved for about 5-7 minutes.
Stir in coconut milk and oil to the egg yolks.
Next, add black glutinous rice flour to the egg yolk mixture in the lowest setting of the mixer until it is all well mixed. Set aside.
In another clean bowl, put the white eggs and beat using medium speed a little while until bubbles form. Add sugar gradually in a stream to egg whites and beat it together until frothy. Add cream of tartar and beat until it is of stiff peak. But take care not to over beat. Set aside
Take the bowl out of the machine, using a spatula, add 1/3 of the egg white mixture and fold gently to egg yolks mixture.


Now, fold in the rest of the egg whites gently until combined. Do not over mix at this stage.
Pour the batter into 25 cm chiffon tube pan. Bang the pan a few times on the counter top to break the air bubbles in the batter so that you do not have huge gaping holes in the cake.


Bake for about 50 to 55 minutes. Some ovens might need a longer period in baking.
Invert tube pan to cool completely on a rack.
It is better to over bake than to under bake in chiffon cakes if you don't want your cake to fall out of your pan when you invert it on a rack to cool.
When it is completely cooled, use a knife and go round the cake pan to remove it.


Monday, March 24, 2014

Kaiser Buns


Kaiser buns or rolls are indeed very nice bread rolls if you like European bread. I have always loved the shape of these bread and especially the dark golden hue on them. I was looking for recipes to make a burger bun for my pulled pork and I suddenly remembered these buns that I saw in the bakeries in Europe. I used to make the softest ever bread for my burgers but not for pulled pork because it has sauce on them and I need substantial harder bread definitely. These Kaiser buns have a good crispy crust and it does not fall apart and lose its shape once any sauce touches it. It gives bite and yet it is not heavy and is actually quite light. It is perfect for my pulled pork burger. I think I would bake these buns for my hamburgers too. I will just leave it whole and round without the knots.
These buns taste great and it is also easy to make. It is probably not the original recipe for Kaiser buns but hey, I don't care, I like it.

This recipe makes about 8 to 9 buns
Ingredients:

380g bread flour (3 cups)
120g whole wheat flour (1 cup) You can substitute it using wholemeal flour
1 tsp instant yeast
18g sugar (1 tbsp)
1 tsp salt
250 ml warm water (1 cup)
15 ml butter, melted
1 large egg, beaten
Another egg for egg wash
Sesame seeds for topping the buns

Method:

Put all the bread flour, whole wheat flour, salt, sugar and yeast in the mixer using the dough hook. Mix well.
Now put the beaten egg, butter and warm water and mix until all the dough come together. if it looks dry, add another tablespoon of water. Do not pour in too much, be patient and it should form into a dough.
Continue to mix at medium low speed until a smooth dough is formed.
You can now turn out the dough into a smooth work surface and knead it for about 2 to 3 minutes till it is very smooth.
If you don't have a mixer, you can do all this by hand as well.You just have to knead it for a good 10 to 12 minutes.


After kneading, form a ball and tug in the ends below and place it in a greased big bowl and cover it with a plastic food wrap and leave it in a warm place.to double the size. This should take between 1 to 2 hours depending on which part of the world you are. In my hot and humid country.it took just slightly more than an hour.
Once the dough has risen nice and big, knock out the air in it and bring it out of the bowl and cut the dough into 9 equal pieces in my place as one piece will weigh about 98g.
Cover the rest of the dough with a piece of kitchen towel when you are working each individual bun. For each individual bun, roll it into a long rope then tie it into a knot and one end tug under the bun and the other end pull it over the top and tog the end in securely.


Place on a baking sheet lined with baking paper or a silpat.
Again cover all the knotted buns with a towel or plastic food wrap loosely for 1 hour or so.
Before the hour is up, heat the oven to 220C. Get ready a roasting pan for putting it at the bottom of the oven.
For the egg wash, beat an egg in small bowl. (I do not mix with water for this egg wash)
Boil water for pouring it into the roasting pan for steaming the oven.
When you are happy with the size of the buns, brush the egg wash very gently all over the buns including the sides.
Sprinkle some sesames seeds on the buns if you like.
Put the baking sheet with the risen buns in the middle rack of the oven.
Pour the boiling hot water into the roasting pan.
Bake buns for 20 to 25 minutes depending how brown you want the buns to be.
It should be nice, crispy and deep golden brown.

Sunday, March 16, 2014

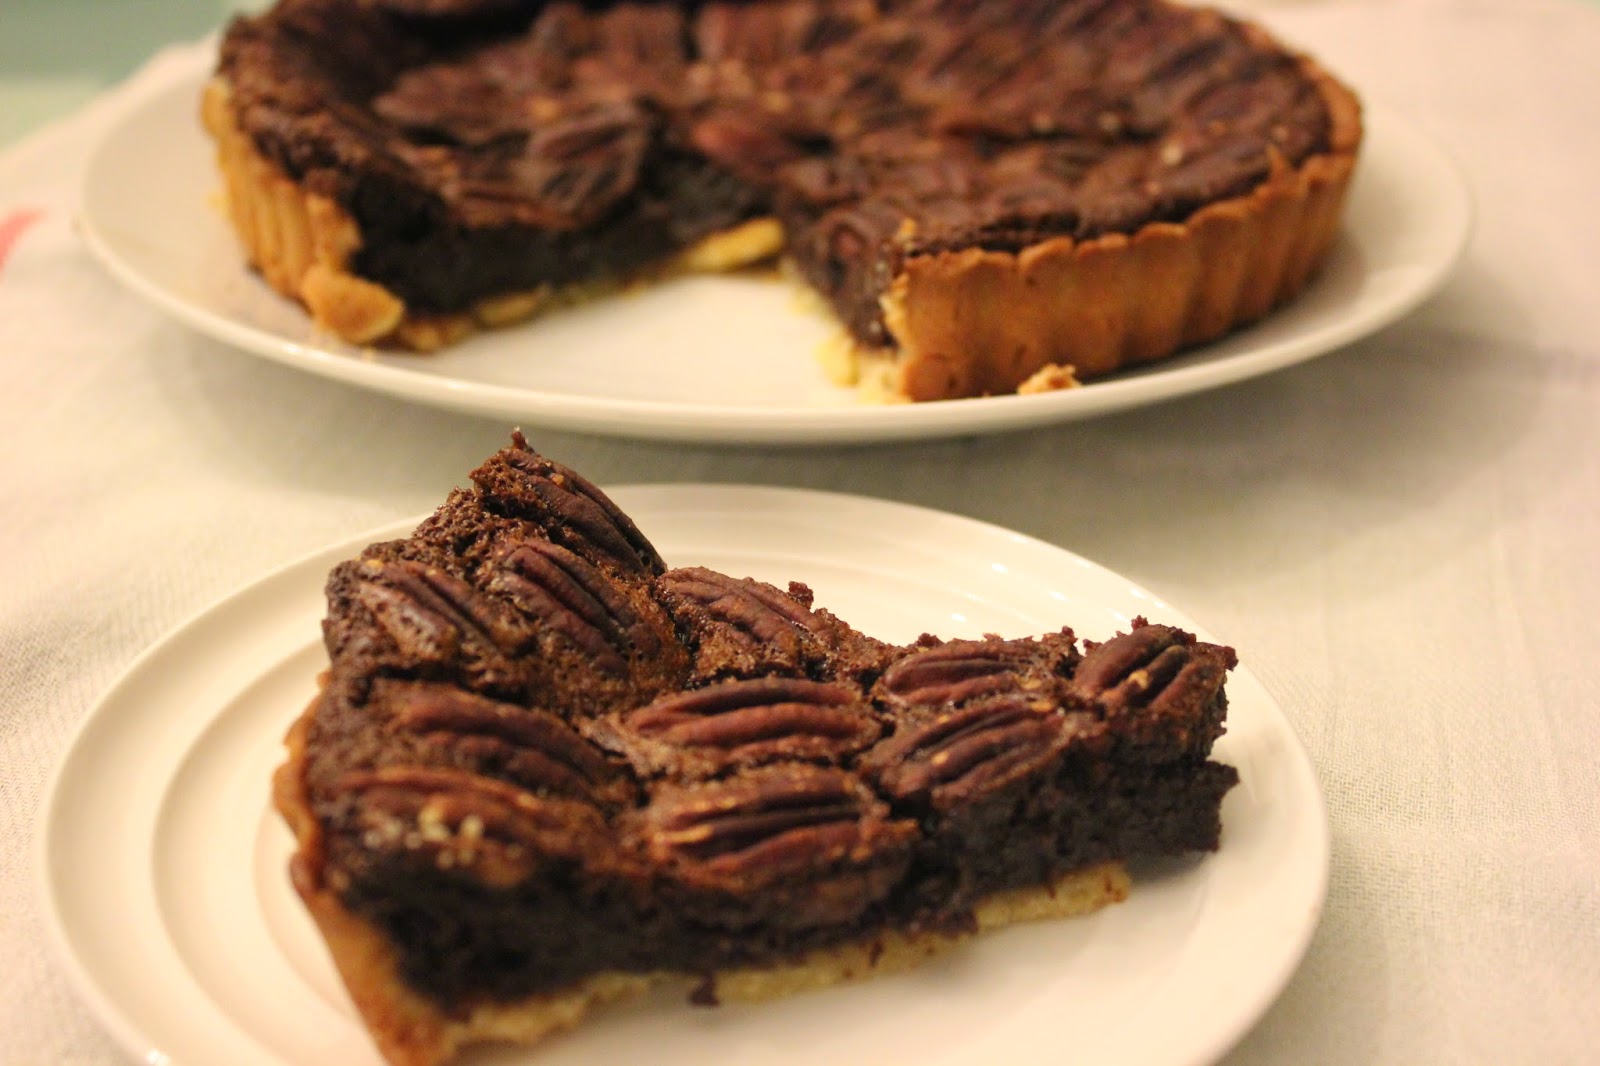
Pecan Pie with Chocolate


It is not Thanksgiving I know, but my pecan nuts have been sitting there for quite a while and I have been pushing it aside to make this pecan pie. I have been wanting to make this pie for the longest time. The cost of the pecans in Singapore is just too high. But recently I managed to find much cheaper pecans and I grabbed a big packet.

Today is the day to make this pie because I have sweet tart dough in the freezer. I love to eat tarts and pies but the thought of making the dough will stop me in its path. Now, I will make a batch of sweet tart dough and store it in the freezer and I can whip it out whenever I feel like making a tart or a pie.

I was imagining how sweet this pecan pie will be looking at the ingredients from the net and my cookbooks and I shudder at the thought of biting into ultra sweet fillings. So I chanced upon a website that adds chocolate to the pie. It sounds good but I would cut of  some of the sweetness, I thought. So here it is, my long awaiting attempt at Pecan Pie with Chocolate.

Sweet Tart Dough 

Ingredients
(You can Make this 1 day in advance because you need to chill and rest the dough for a minimum 4 hours or up to 2 days, before rolling and baking)
285g butter (softened)
180g icing sugar
100g ground almond
1/2 tsp salt
1/2 tsp vanilla extract
2 large eggs
490g plain flour (sifted)

For making the sweet tart dough, put the softened butter in a mixer bowl, put on the paddle and mix till light and fluffy.
Add icing sugar, almonds, salt, vanilla extract and eggs and mix on low speed. Blend well after scraping the sides.
Add the sifted flour in a few additions, do not add all at once.
Switch off the machine as soon as dough comes together. Do not over mix.
Divide the dough into two or three portions. Roll each portion into a ball and wrap with food plastic wrap and chill in the fridge for at least 4 hours preferably. You can store the rest in the freezer if you are not using it. This can be stored for up to a month.
 
Filling
 
Ingredients
 
3 large eggs (60g each)
240g corn syrup (3/4 cup)
80g brown sugar
20g fine sugar
1 tsp pure vanilla extract
125g semi sweet chocolate (55% )
160g Pecans to arrange on top (1 1/2 cups or might need more)
 
Assembling the Pecan Pie (23 cm or 8 inch tart tray)
 
Get the sweet tart dough out of the freezer or fridge.
Turn on the oven to 180C
To make the tart, cut out a freezer bag or a big clean plastic bag, and put the dough in between to roll out. (no table to clean and you do not need to wash the rolling pin too, how good is that?)
Cut the dough according to size of the tart tray. (8 inch or 23 cm)
Press gently onto the tray and poke holes all over with a fork.
Put it back into the fridge for 20 minutes.
We do not need to precook the dough for this recipe.
In the mean time, we can make the filling.
Boil some water in a small saucepan,
In a medium metal bowl, melt the chocolate in a bain marie or double boil, making sure not to let the bottom of the bowl touch the boiling water. Stir the chocolate till it melts. Set aside.
In a large mixing bowl, crack the 3 eggs into it, add the corn syrup, brown sugar, fine sugar, vanilla extract, and pour in the melted chocolate.
Beat well with a whisk till all the sugar is dissolved and well mixed.
Take the tart tray out of the fridge, and pour in the egg mixture slowly.
Carefully arrange the pecan nuts onto the mixture. Don't worry, the nuts will definitely float on top.
Put the tart tray on a baking sheet so that if it spills, it will not dirty the oven and at the same time it is easier to transport the filled tart tray to the oven this way.
 
Bake for 30 to 40 minutes. Insert a toothpick to check for doneness.
Cool the pie  on a metal rfack for at least a couple of hours before serving.
The pie will look puffed up at first but it will subside as it cools.


Sunday, January 5, 2014

Meyer Lemon Tart


I have finally found Meyer lemons. I always wanted to taste one and yes, I like it. It is sweet and a little sour. I have been reading other baking blogs and envying others from other countries who can get Meyer lemons readily or even grow their own Meyer lemons trees. Singapore is a tropical country which gets so hot, you could hardly grow anything.

Recently I chanced upon an upmarket new supermarket that were selling these Meyer lemons. Imagine my delight! They were exorbitant but I could not help grabbing a packet of 5 lemons inside. They were like almost S$10 for 5 small lemons. I just had to buy it as I have not tried tasting any Meyer lemons before. Then a day later, I saw the same kind of lemons at NTUC Finest selling at S6.95 ! I just have to average the price by buying another packet!

Meyer lemon is a citrus fruit native to China thought to be a cross between a true lemon and either a mandarin or common orangeThe Meyer lemon fruit is yellow and rounder than a true lemon. The skin is fragrant and thin, coloured a deep yellow with a slight orange tint when ripe. Meyer lemon fruits have a sweeter, less acidic flavor than the more common lemon varieties. The pulp is a dark yellow and contains up to 10 seeds per fruit. 

Since I love lemon curd, the first thing i did was to make it with the Meyer lemons. Lemon curd is so easy to make and it tasted great with no sour taste to it at all. It is much kinder to the palette and I actually can use less sugar to make the curd. Really tasty and delicious.

I used the curd to make a tart, it turned out beautifully and it tasted lemony but without the sour tone.

The recipe is adapted from  americanfood.about.com which uses egg yolks instead of whole eggs. I happened to have a lot of egg yolks after making financiers. The sweet tart dough recipe is from Pierre Herme.

Meyer Lemon Curd


Ingredients:


6 egg yolks

1 cup sugar
1/3 cup fresh lemon juice 
2 tbsp grated lemon zest
1/2 cup cold unsalted butter (125g butter), cut into cubes

Preparation:


  1. Add 1-inch of water to a medium saucepan and bring to a simmer over low heat. In a medium metal bowl whisk the egg yolks and sugar for about 2 minutes until smooth. Whisk in the lemon juice and zest until combined.
  2. Place the mixing bowl on top of saucepan (the bowl should be wide enough to fit on top of the saucepan, but shouldn't be touching the simmering water). Stir the mixture constantly with a rubber spatula, scraping the bottom and sides of the bowl as you stir, until it begins to thicken, and will coat the back of a spoon. This will take approximately 7 to 10 minutes. Remove from heat.
  3. Whisk in the butter, one slice at a time until it is all well mixed. Spoon into clean glass containers and allow to cool with a piece of plastic wrap laid on the surface to prevent a skin from forming.
Refrigerate until needed. This lemon curd will keep for 2 to 3 weeks.
Sweet Tart Dough
Ingredients
(You can Make this 1 day in advance because you need to chill and rest the dough for a minimum 4 hours or up to 2 days, before rolling and baking)
285g butter (softened)
180g icing sugar
100g ground almond
1/2 tsp salt
1/2 tsp vanilla extract
2 large eggs
490g plain flour (sifted)

For making the sweet tart dough, put the softened butter in a mixer bowl, put on the paddle and mix till light and fluffy. 
Add icing sugar, almonds, salt, vanilla extract and eggs and mix on low speed. Blend well after scraping the sides.
Add the sifted flour in a few additions, do not add all at once.
Switch off the machine as soon as dough comes together. Do not over mix.
Divide the dough into two or three portions. Roll each portion into a ball and wrap with food plastic wrap and chill in the fridge for at least 4 hours preferably. You can store the rest in the freezer if you are not using it. This can be stored for up to a month.
Heat the oven to 180 C, when you are ready to make the tart, cut out a freezer bag or a big clean plastic bag, and put the dough in between to roll out. (no table to clean and you do not need to wash the rolling pin too, how good is that?) 
Cut the dough according to size of the tray. (8 inch)
Press gently onto the tray and poke holes all over with a fork so that it allows air to go around when baking.
For a big tart, put beans on alluminium foil before baking at 180 C for 18 to 20 minutes, remove the beans and bake for another 5 minutes till golden brown.

Cool the tart shells on a rack. 

To assemble the Meyer Lemon Tart (8 inch round)

When the tart shell is cooled, spread the prepared lemon curd (room temperature) onto the shell. you can shave some green lime zest on it. 
Cut and serve.

Alternatively, you can bake the assembled lemon tart in a 170 C oven for 15 to 20 minutes till the tart is just a tad wobbly and a tad golden brown.

Enjoy!


Saturday, July 20, 2013

Cronuts Homemade


CRONUTS

What is a Cronut? It is described by many as a half croissant, half doughnut, this pastry hybrid by Chef Dominique Ansel from Dominique Ansel Bakery in New York's Soho neighbourhood, is taking the world by storm. After its launch on May 10, 2013, Cronut fans spanned the world from Berlin to Singapore, making it the most viral dessert item to date. I just read he invented something new again, like a custard ice cream in marshmellow.

He took two months to perfect the Cronuts recipe. Chef Dominique Ansel’s creation is not to be mistaken as simply croissant dough that has been fried. It is made with a laminated dough which has been likened to a croissant, the Cronut is first proofed and then fried in grapeseed oil at a specific temperature which he of course did not reveal. Once cooked, each Cronut is flavoured in three ways. It is rolled in sugar, filled with cream and topped with glaze. Once fried, these things have a short shelf life. As the hours wear on without eating it, the exterior crispness suffers whilst the centres soften. It will still be tasty, but not as tasty as they could have been if consumed close to making. They should not be stored inside the fridge.

People queue up for hours for it and there are scalpers that sell up to $100 a pop. As I won't be going to New york anytime soon, I tried making some myself just for fun and curiosity. Croissant dough is difficult to make and after reading that it is actually laminated dough, I thought of a short cut method. I used puff pastry and add butter to it. I didn't need to proof the dough at all. It still tasted fantastic to me. It was fluffy and crispy at the same time. A different kind of feeling in the mouth from croissant or a donut.

CRONUT Recipe:

2 sheets of square puff pastry, frozen (I used Pampas, please do not thaw)
80g cold unsalted butter
Grapeseed oil or Canola oil for deep frying
Fine or castor sugar for coating
Pastry cream
Glaze

Method:

Cut out 2 medium sized freezer bags (plastic bags, cut out one of the sides and the bottom)
Lay out one piece of puff pastry straight out of the freezer onto one side of the freezer bag.
Cut thin slices of chilled butter (about 40g) and lay them on one half of the puff pastry.
Fold the pastry into half.
Flip the other side of the freezer bag over and cover the pastry.
Roll the pastry thinner lengthwise. (the rolling pin will not be dirty as it is rolling on the freezer bag and you don't need to use extra flour on the pastry.
Fold the pastry into thirds.
Roll again into a bigger rectangle.
Now fold again into a smaller square.
Now it is about 2 cm thick.
Put the pastry in the fridge to firm it out.
Repeat with the another sheet using the other 40g of butter.

CREME PATISSERIE (Pastry Cream)
Adapted from All Recipes

Ingredients
 
500ml milk
100g sugar
1 vanilla bean or 2 tsp of vanilla extract
5 egg yolks
4 tbsp plain flour
60g unsalted butter
1 pinch salt
 
Method:

Place the milk, half the sugar and the vanilla bean in a saucepan over medium heat. (If using vanilla extract, add it only later)
Combine the egg yolks and the remaining sugar in a bowl and whisk until light in colour. Add in the flour and the salt, mix to combine.
When the milk just begins to boil, remove from heat and remove vanilla bean.
Very slowly dribble the hot milk into the yolk mixture, stirring all the time.
When about half of the milk has been added, place all of the yolk mixture into the saucepan over medium heat.
Using a spatula or a whisk, mix the pastry cream as it heats, making sure to reach all of the corners of the pan when you stir.
Bring the mixture to the boil. Let boil for about 1 minute, stirring constantly. The mixture will be thick.
Remove from heat and add the butter. (If you are using vanilla extract, add in now)
Strain if you wish for a smoother cream.
Place into a bowl and cover directly with cling film to stop a skin from forming on the cream.
Chill and use within a few days.
 
GLAZE
Adapted from All Recipes

Ingredients
120g icing sugar
2 tsp milk
1 tsp melted butter
1 tsp vanilla extract
pinch of salt
 
Method
 
Melt the butter and add to rest of ingredients. Mix until creamy and thick.
 
COOKNG & ASSEMBLY
 
Take out the pastry from the fridge.
Use a donut cutter to stamp out donut rounds, it will yield about 4 rounds to 5 rounds, plus the middle portion which you take it out and the sides after you have lifted the rounds. (I did not leave any wasted)
Repeat for the second piece of pastry.
Heat up the oil in a pan and fry the pastry till golden brown.
Drain the fried pastry.
Let it cool for a while and dip the pastry into the sugar to coat it all round.
Put the creme patisserie into a piping bag with a nozzle and push the tip of the nozzle to pipe the cream into the pastries from the sides.
Spoon the glaze onto the top of the pastries.
Enjoy while it is still warm and crispy.


PS: My experimental cronuts are not high and the layers are not as profound as the one you see from Dominique Ansel Bakery of course. I reckon if you want it much higher with many layers, do stack two sheets of puff pastry together and it will definitely need more butter needless to say. That means even higher calories! I leave it up to you. Mine is good enough for me.
 
Donut cutter
Puff pastry sheets


Friday, March 22, 2013

Seafood Crispy Tofu


I first ate this in a restaurant long ago and I really liked it very much. I remember it was very tasty and I could not stop eating it. It certainly has full of ingredients in the tofu. I had to bring some food to my friend's house one day and she requested for a tofu dish. I thought of this particular tasty tofu dish and I did not hesitate to look for the recipe on the net. I did find a few versions but just had to adapt and add on my own ingredients to the recipe.

Mine turned out just the way I wanted it.
This recipe is adapted from WendyinKK


Seafood Crispy Tofu

Ingredients:

6 tubes of egg tofu
1 block of white soft tofu (choose the one for steaming)
200g fish paste (fish that is blended to a pulp)
6 pieces of prawns, chopped and mashed
2 eggs
Half a grated carrot
6 water chestnuts, chopped or diced
2 tbsp of finely sliced spring onions
2 tbsp of finely sliced coriander
1 1/2 tbsp of corn flour
Salt and pepper to taste
1 packet of potato flour for frying
Oil for deep frying

Method:

Get ready a heat proof metal tray or cake pan which is at least 2 inches deep.
Line it with heat resisitent plastic wrap for easy removal.
Put water in the steamer to boil.
Unwrap all the tofu and put it in a mixer.
Add in fish paste, prawns, carrots, water chestnuts, spring onion and coriander.
Turn the mixer on to low speed.
Mix thoroughly till well blended. 
Add the eggs and mix well again. 
Put in salt and pepper to taste and mix again.
Put the mixture into the lined pan.
Steam on medium heat for around 20 minutes. Checking it after 10 minutes.
As soon as it is hardened, test it with a skewer, if it comes out clean, it is done. Do not over steam the tofu.
Let the steamed tofu be totally cooled before removing it from the pan.
When the tofu is cooled, lift up the plastic wrap from the pan and onto the chopping board.
Cut the tofu into rectangular pieces.
Heat a pan of oil for deep frying.
Dip the pieces of tofu in the potato flour and coat it well.
Fry the pieces of tofu till golden brown.
Arrange the pieces nicely and serve warm.
It is nice to serve it with Thai chilli sauce and sweetened golden orange 'oil'. (gek you)


Wednesday, March 20, 2013

Frangipane Tart with Blueberries


Frangipane is a filling made from or flavoured like almonds. This filling can be used in a variety of ways including cakes, tarts and other assorted pastries. It is normally made of butter, sugar, eggs and ground almonds. 
I like anything with almonds in it and you can add fresh fruits, can fruits or jam and it is good to go.
This particular sweet tart dough is a little sweet, very crispy and has also ground almond in it. It is a little different from ordinary sweet tart dough and worth making a batch to keep in the freezer and take it out whenever you need it. The filling is enough for 6 to 7 individual tarts and the tart dough needs pre baking but do not need to weigh it down with baking beans if you poke enough holes in them.
This recipe is adapted from Jamie Oliver 30 minute meals and Pierre Herme's Desserts. 
                           

Frangipane Tart with Blueberries Recipe

Ingredients for Sweet Tart Dough (enough to line two 9 inch tarts or 12 individual tarts)
285g butter (softened)
188g icing sugar
50g ground almond
1/2 tsp salt
1/2 tsp vanilla extract
2 large eggs
500g plain flour (sifted)

For making the sweet tart dough, put the softened butter in a mixer bowl, put on the paddle and mix till light and fluffy. 
Add icing sugar, almonds, salt, vanilla extract and eggs and mix on low speed. Blend well after scraping the sides.
Add the sifted flour in a few additions, do not add all at once.
Switch off the machine as soon as dough comes together. Do not over mix.
Divide the dough into two or three portions. Roll each portion into a ball and wrap with food plastic wrap and chill in the fridge for at least 4 hours preferably. You can store the rest in the freezer if you are not using it. This can be stored for up to a month.
Heat the oven to 180 C, when you are ready to make the tart, cut out a freezer bag or a big clean plastic bag, and put the dough in between to roll out. Cut according to size of the tray. 
Press gently onto the tray and poke holes all over with a fork so that it allows air to go around when baking.
For a big tart, put beans on alluminium foil before baking at 180 C for 18 to 20 minutes, remove the beans and bake for another 5 minutes till golden brown.
For individual small tart shells, we do not need to use beans for weighing them down.
Bake for 15 to 20 minutes at 180 C till golden brown for the small tarts.

Cool the tart shells on a rack and prepare the filling.

Ingredients for the Filling:
1/2 punnet to 1 punnet of fresh blueberries
100g butter (softened)
100g ground almond
100g sugar
1 egg
Zest of 1 orange
1 tsp of vanilla extract

Heat the oven to 180 C.
Put butter, almond, sugar, zest, vanilla extract and the egg into a mixing bowl. Use a silicon spatula and mix the ingredients together to a paste. It is that simple. 
Fill the individual tart shell first with a big spoonful of filling, put about 10 of the blueberries in them, then top the tart with the another spoonful or two of the filling. You do not need to smoothen the filling as it will spread out on its own during baking.
For a big tart, put in half of the filling into the tart shell, spread the blueberries onto the filling and add in the remaining filling. 
Bake at 180 C oven till golden brown, around 30 minutes. Checking after 20 minutes of baking.
Cool the tarts on wire racks. Remove tart from metal tart trays and serve warm. You can serve them with Vanilla ice cream if desired.


Friday, December 14, 2012

Madeleine Classic


This is one of the bakes that I will quickly whip up if I am given a very short notice of friends coming for tea. Madeleines are very easy to prepare and taste very delicious. It is also classy and light. It takes just a short while to bake in the oven. We can put it into the oven to bake once our guests are seated. For less than ten minutes in the oven, our guests will have nice freshly baked madeleines.

The madeleine is a traditional small sponge cake from Commercy and Liverdun, in northeastern France. Madelenes have a distinctive shell-like or scallop shape acquired from being baked in pans with shell-shaped depressions.

The story in the 18th century goes that a girl name Madeleine made them for Stanislaw Lezczynski, Duke of Lorraine, who loved them so much that he then gave some to his daughter, Marie, the wife of Louis XV. Their popularity grew from that point on and enjoyed round the globe.
A genoise cake batter is used. The flavour is similar to, but somewhat lighter than, sponge cake. Some traditional recipes include very finely ground almonds. A variation uses lemon zest, for a pronounced lemony taste.

Traditional madeleines have a big bump on their backs. If you chill your batter, all the bigger the hump will be. But if you have no time to chill, bake it straight away and it will still taste the same, only with a smaller hump or bump.

Classic Madeleine
Makes about 24

Ingredients

95g (3/4 cup) plain flour
1/2 tsp double acting baking powder
2 large eggs
100g (1/2 cup) sugar
Grated zest of 1 lemon
2 tsp vanilla extract
120g (5 tbsp unsalted) butter, melted & cooled
Icing sugar for dusting

Method

Sift the flour and baking powder.
In a stand mixer, beat the eggs and sugar until light and fluffy. (Of course you can do it by hand)
Beat in lemon zest and vanilla extract.
Fold in the sifted flour mixture by hand.
Add in the melted butter. Mix until the butter is incorporated.
Cover with plastic wrap, pressing against the surface of the batter and chill for 3 hours in the fridge.(This is optional if you have the time plus if you want a big bump on the back of your madeleines)
If not, you can bake it without chilling it.
The special technique for baking madeleines and for getting a big bump on their backs is to combine hot and cold.
Center a rack in the oven and put a baking sheet (hot) on the rack and preheat the oven to 200 C (400 F).
Spray the special madeleine pan with cooking spray or butter and dust with flour.


Fill pan with 3/4 full of chilled batter.
Bake the madeleines for 8 minutes on the very hot baking sheet or until the madeleines are golden and the tops spring back when touched.
Remove the pan from the oven and release the madeleines from the molds by rapping the edge of the pan against the counter. Gently pry the madeleines from the pan using your fingers or a butter knife. Transfer the cookies to a rack to cool for a while.
Dust with icing sugar and serve shell side up with tea or coffee.


Related Posts Plugin for WordPress, Blogger...